Camlock couplings are designed for safety and efficiency, but only when used correctly. Improper operation can lead to sudden releases, spills, and workplace injuries. This step-by-step guide will ensure you and your team handle Camlock couplings safely every time.
Before You Begin: Essential Safety Precautions
-
Personal Protective Equipment (PPE): Always wear appropriate PPE, including safety glasses, gloves, and chemical-resistant clothing if handling hazardous media.
-
Depressurize the Line: Before connecting or disconnecting, ensure the system is fully depressurized and the line is drained if possible.
-
Inspect the Coupling: Check for damage, worn cam arms, cracks, or a damaged/missing O-ring. Never use a defective coupling.
-
Check Compatibility: Ensure the two couplers are designed to connect (e.g., Type A to Type B) and are made of compatible materials for the fluid.
How to CONNECT a Camlock Coupling: A Step-by-Step Guide
Step 1: Align
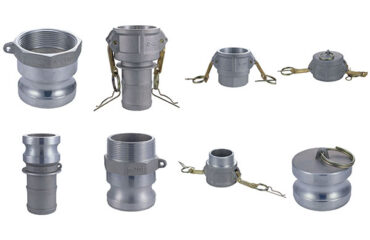
Hold the Type A (Male) Adapter and the Type B (Female) Coupler straight and align them. Ensure the lugs on the male end line up with the openings on the female coupler.
Step 2: Insert
Push the male adapter fully into the female coupler until it seats completely. The base of the male adapter should be flush against the face of the female coupler.
Step 3: Lock
Grab the cam arms (levers) on the female coupler’s collar. Pull them down firmly until they are in the fully locked position. You should hear or feel a distinct “click” or positive lock.
Step 4: Verify
After locking, perform a tug test. Gently try to pull the two halves apart to confirm they are securely locked. Slowly introduce pressure to the system and check for any leaks.
(Image/Video Suggestion: A short GIF or video showing the smooth motion of insertion and locking would be highly effective here.)
How to DISCONNECT a Camlock Coupling: A Step-by-Step Guide
Step 1: Depressurize and Drain
This is the most critical safety step. Fully depressurize the system and drain any residual fluid from the line. Be aware that fluid may be released during disconnection.
Step 2: Unlock
Lift the cam arms on the female coupler to their fully upright and unlocked position.
Step 3: Separate
Pull the two halves straight apart. If they are stuck, do not use excessive force. Check that the system is fully depressurized and that the cam arms are completely unlocked.
Step 4: Cap (If not in use)
Immediately cap open ends with Type M (Blanking Plugs) and Type DP (Dust Plugs) to prevent contamination and damage.
What NEVER to Do
-
NEVER try to connect or disconnect under pressure.
-
NEVER use a hammer, pipe, or other tool for extra leverage on the cam arms.
-
NEVER modify, weld, or alter a coupling.
-
NEVER force a connection if the halves don’t align easily.


